
Grounded ... Flooret Flooring Installation In Alice The Tiny House.
- Dec 18, 2025
- 5 min read
Installing Engineered Hardwood Floors in Your Tiny House: A Complete Guide
The Beginning

This is one of those projects that absolutely took me through it from start to finish. Now that I'm finished, and standing on my brand new floors, every minute setback was worth it.
A quick breakdown of where this all started, and where we are now.
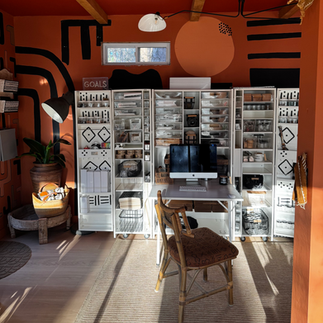
When I moved into my home, one of the main selling points was the unfinished build of the tiny house on the back of the property. My home sits on 2-acres, so when in the tiny home it truly feels like I'm in my own little world ... away from everything.
What was even better about this little gem was that it was completely unfinished, which meant that for once I had the beautiful opportunity to start from a blank slate.

For a long time I was able to work in my office with the unfinished floors, but as I began shaping the space through decor, it became clear that I could no longer delay the installation.

That's when the hunt began, and I came across Flooret and immediately knew that this was the flooring that I wanted installed in the tiny house.
For my tiny house, I chose engineered hardwood. It combines the natural beauty of real wood with stability, durability, and versatility that perfectly suits tiny homes.
In this guide, I will take you through every step of installing engineered hardwood floors in a tiny house, from understanding the material to the final finishing touches. I will also share why I partnered with Flooret, and how their products made this

project smoother and more intentional.
What is Engineered Hardwood Flooring
Engineered hardwood is made of multiple layers. The top layer is real hardwood, giving it that authentic look and feel. Beneath it are several layers of plywood or high-density fiberboard, arranged so the wood grains run in alternating directions. This cross-laminated construction provides strength, stability, and resistance to warping.
One of the most important features for tiny homes is that engineered hardwood is extremely resistant to weather fluctuations and temperature changes. Unlike solid wood, it will not expand, contract, or cup as easily when exposed to heat, cold, or humidity. This makes it ideal for small, often mobile spaces that experience shifting conditions.
How Engineered Hardwood Differs from Other Flooring Options
Solid Hardwood – Solid wood planks are made entirely from one piece of wood. While they are timeless and beautiful, they can expand and contract with changes in humidity, making them less ideal for tiny houses or spaces with variable climates.
Laminate Flooring – Laminate is made of a photographic layer over fiberboard. It mimics the look of wood but is not real wood. It is usually more affordable, scratch-resistant, and moisture-resistant, but it lacks the natural texture, warmth, and longevity of real wood.
Vinyl Planks or Luxury Vinyl Tile (LVT) – Vinyl planks are durable, water-resistant, and come in a variety of wood-like finishes. They are affordable and practical, but they do not have the same feel, natural warmth, or long-term value that real wood provides.
Engineered hardwood gives you the natural beauty of wood along with stability, durability, and weather resistance. It is versatile enough to install over many subfloors, which is a big advantage in tiny house construction or renovation.
Why Engineered Hardwood is Perfect for Tiny Houses
Engineered hardwood balances form and function. It is beautiful, practical, and adaptable. Its durability and resistance to moisture make it ideal for spaces where every square foot counts. It is also available in click-lock styles, making installation feasible for DIY enthusiasts who want a hands-on approach without compromising quality.
Partnering with Flooret
For this tiny house project, I partnered with Flooret, a company known for high-quality engineered hardwood and flooring products. They offer a range of options from classic oak and walnut planks to unique finishes that bring personality and warmth to any space.
What I loved about working with them:
Expertise and Guidance – They helped me select the perfect style and finish for my tiny house, balancing beauty and durability.
Quality Materials – Their engineered hardwood is designed to resist scratches, moisture, and the natural shifts that come with small spaces.
Hands-On Experience – They provide a kit of flooring samples so you can see and feel your choices in real time, making it easy to choose the perfect plank.
Support for DIYers – Their team provided installation tips and resources that made the process smooth and manageable.
Working with the right company was just as important as choosing the flooring itself. Partnering with Flooret gave me confidence that the floors would look amazing, feel incredible underfoot, and stand the test of time.
Tools You Will Need:
Materials You Will Need:

I went with the style Balboa
Step 1: Prepare Your Space
Preparation is everything. Remove furniture, appliances, and obstacles. Inspect the subfloor to ensure it is clean, dry, flat, and sturdy. Any dips or high spots should be leveled. Acclimate your planks in the room for at least 48 hours so they adjust to temperature and humidity.
Step 2: Install the Underlayment
Roll out your underlayment perpendicular to the direction you plan to lay the planks. This provides a moisture barrier, adds comfort, and reduces sound. Tape seams if needed and trim excess along walls.
Step 3: Plan Your Layout
Planning your layout helps your tiny house feel spacious and cohesive. Decide the plank direction—lengthwise along the longest wall usually makes the room feel bigger. Measure

and mark a centerline. Dry-lay the first row to check for balance and plan end-plank cuts.
Step 4: Install the First Row
Place spacers along walls to maintain a 1/4-inch expansion gap. Angle the tongue of the plank into the groove and tap gently with a rubber mallet. Stagger seams in subsequent rows at least 6 inches for stability and a natural appearance.

Step 5: Continue Installing Rows
Keep rows tight and aligned. Use a tapping block to avoid damaging plank edges. Cut planks for row ends using a miter saw or jigsaw. Always maintain expansion gaps around edges and doorways.
Step 6: Finishing Touches
Remove spacers and install baseboards or quarter-round molding to cover gaps. Add transition strips where the flooring meets other surfaces. Clean your floor with a soft broom or microfiber mop. Avoid water saturation for the first few weeks to preserve the wood.
Tiny House Flooring Tips
Choose lighter colors or wide planks to make the space feel larger.
Plan around door swings and tight corners to avoid future issues.
Consider the added insulation from underlayment for comfort and soundproofing.
Keep extra planks on hand for repairs or future modifications.
All in all, installing engineered hardwood floors anywhere in your home is a rewarding DIY project that brings elegance, warmth, and long-term durability to your home. With careful planning, the right materials, and a bit of patience, you can transform your space big, or small, into a cozy, stylish retreat.
Whether you’re starting fresh or upgrading your flooring, engineered hardwood is a choice you won’t regret - so if you're on the fence about taking the leap, consider this your sign to get to it!

I couldn't be happier with my girl Alice. This has truly been a labor of love, and I've enjoyed looking back at how much progress it took to get here.
This space can truly now serve in the capacity in which I've always wanted it to - which is my office, and my little getaway when I need a break from the reno life.
Thank you to everyone who has followed along, and showed so much support and love.


Comments